


Bumper - this is the part of the body that experiencescolossal loads. The surface constantly suffers sand blasting (road dust), small stones fall into it. And in the parking lot can also rub it. Of course, the appearance of the bumper significantly affects the overall appearance of the car. And in order to return the car to its former, factory look, it will be necessary to repair the bumper with your own hands. Putty and painting are inevitable processes. Although you can do without them. Well, let's look at how the bumper is repaired and painted with our own hands.
First, consider a method that does not requireThe presence of a spray gun and cans with putty. But at once we will note, that the integral condition of a paint and varnish covering is an obligatory condition for it. Cracks and deep scratches can not be restored by this method.

Please note that when using a hairdryerthe surface becomes very hot. Do not forget to wear protective gloves. Also remember that under the influence of hot air, the moldings can be peeled off spontaneously. It is quite difficult to paste them back. Therefore, it is necessary to exclude the ingress of hot air to their surface.
Sometimes it is required to repair the plastican element that previously visited an accident. The scale of the work can vary: from deep scratches to torn parts with cracks. In the first case, only local painting will help. The enamel is applied by the transition. In the second case, the bumper is repaired and painted. Well, let's consider how to restore this element in stages.
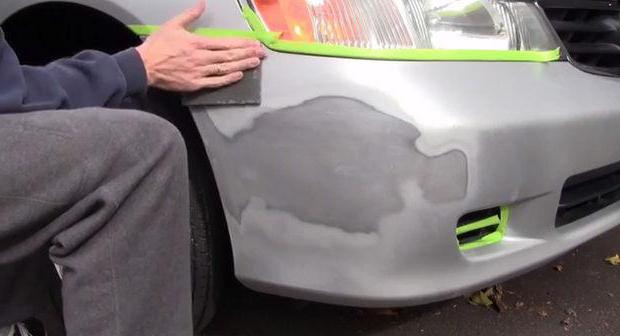
For large damages, it is recommended to removeelement from the car and make it repair separately. Surface preparation begins with a sink. It should be thoroughly cleaned not only from dirt, but also from bituminous stains (especially if it is repair and painting the rear bumper).

Pay attention to the degreaser. Not every solvent is well suited simultaneously for metal and for plastic. If it is a PVC-element, it can simply corrode an aggressive compound. Experts recommend using degreasers of two series:
The latter is also similar to ABS plastic. It is not aggressive to the material and at the same time qualitatively cleans the surface from contamination. Before processing it is recommended to preheat the bumper to 50-60 degrees Celsius.
In the case of a cracked bumper,exhausting work. To do this, we will need sandpaper with a different degree of granularity and a solvent. So, we scratch the paintwork a couple of centimeters wide from the crack. Remains of the enamel are washed off with a solvent (it is dipped in a soft rag). If there are remains of paint in the crack areas, the strength of the restored bumper will be in question. The repair pad is installed on a dry and carefully prepared surface.
The plastic is grasped with a soldering iron on both sides. So we will give the bumper the right shape. Next, we pick up a reinforcing mesh (such as in the photo below) and apply it on the back of the element.

So, when the reinforcing mesh withered, proceedto the alignment of defects. Even when forming the shape of the element (when the parts are caught with a soldering iron), strong transitions will be visible. To hide them, you need putty. Mix it with the hardener and apply a small spatula to the surface. The composition is applied in several layers, with drying. Each new layer must be carefully sanded. To do this, we use sandpaper with fine grain and a bar (so that there are no noticeable run-ups in the effort).

After drying the finish coat again degreaseplot. Next, you need to give the surface the best adhesion. For this, the soil is used. Note that the composition intended for metal will be useless on plastic.
Now go to the application of enamel. You can go in two ways:
Now many companies "blow out" numbered paint in cans. Of course, this service is worth some money. But it is still cheaper than buying a whole set of equipment for painting.
Apply enamel in a closed, not dustyindoors. If you hit the slightest pollen, you will see shagreen. We do not need this. Therefore, we hang the bumper (or put it on a clean, level surface) and paint it. First, a developing layer is applied. It must be the thinnest. Then apply the base layer of enamel. It is important to distribute the paint correctly on the surface. Direct the torch strictly at right angles and at a distance of 30-40 centimeters (if nearer, there will be streaks if further - blanks). We paint at a speed of 0.4-0.5 meters per second.

Painting and repair of bumper - long enoughprocess. It takes at least two days to apply the paint before it dries. After this period, carefully polish the paint. Better for this use a corner machine with a set of felt circles.

If local painting and repair is carried outbumper, the enamel is applied by the transition. To minimize this effect, we adhere to small rules. First, the enamel is applied to the damaged area itself. As soon as she moved to the edges of the factory, we increase the area of the spray. Now the distance from the torch to the bumper should be 50 or more centimeters. The farther we are repelled from the repaired plot, the greater the distance. Lacquer is applied in the same way.
So, we found out how the painting and repair of the bumper is done by our own hands.
</ p>
