


A few decades ago, furniture wasto get very difficult. This contributed to the fact that the home masters made it themselves. Today in every store you can find a model for every taste and purse, but to this day it is customary to buy sheet materials that go to the production of cabinet furniture.
The rack is used for interior decorationoften. It has functional qualities, and its appearance does not increase the perception of the room. Such a piece of furniture you can buy in the store, but not always its size, shape and color are suitable for the buyer. In this case, it is better to do the construction yourself, using a chipboard, which will save and simplify the work.

Before you make a rack, you shoulddecide whether the design should be cheap or stylish. Thickened details can create a sense of monumentality and massiveness. Such a piece of furniture will look expensive, but it will take twice as many materials, efforts and time. Therefore, it is recommended to use a 16 mm chipboard.
Horizontal planes will need 6 pieces,the size of each of which should be 1200x350 mm. Vertical planes should be cut out in an amount of 15 pieces, the parameters of each of them should be equal to 320x320 mm. If you decide to perform a stylish rack of chipboard, then the number of parts should be multiplied by two. This option will stand on the horizontal bars in the color of the chipboard, but they can be replaced with furniture legs selected in the hardware store.

As the main fixture for furniture performConfirmates, the sizes of which are equal to 5x70 mm. If you buy a box with 1000 pieces, you can save 5 times when compared with the retail price. In addition to the legs and confirmats, you should purchase a melamine edge with an adhesive base. Vertical planes will be visible from both sides, and it is better to fix the composite parts with each other from the working ends. The edge must be purchased wide, from the standard 22-mm it is necessary to refuse.

If you run a stack of chipboard, thenit is necessary to prepare also details of a design. Laminated plate does not make sense to saw at home, unless you have a circular saw with a quality disc. These manipulations are best entrusted to professionals who are engaged in the manufacture of furniture. But paste the edge you can with your own hands, using a conventional iron to warm up the glue surface. The regulator should be set to 3/4 of the maximum power.
After this, you must attach the edge to the end faceparts, warm up and come with a dry rag. A rag on the surface should be held several times to make sure that the edges fit securely. Excess surpluses are cut off with a knife and processed with fine-grained sandpaper. Do not grind with polishing, otherwise you will get a chamfer that does not need anything on the chipboard furniture.
Making a rack of chipboard, you need to useConfirmates as ties. In the plane through 8-mm holes are made, in the ends of the details it is necessary to make 5-mm holes, deepening by 60 mm. In order not to encounter difficulties when using the hand keys, which are realized together with the confirmations, you should purchase a hexagonal bit for the screwdriver. In order to ensure that the rack of chipboard turned out to be original, vertical planes can be arranged as you like. The main requirement in this case is that the holes under the fasteners coincide, and the design itself is stable.

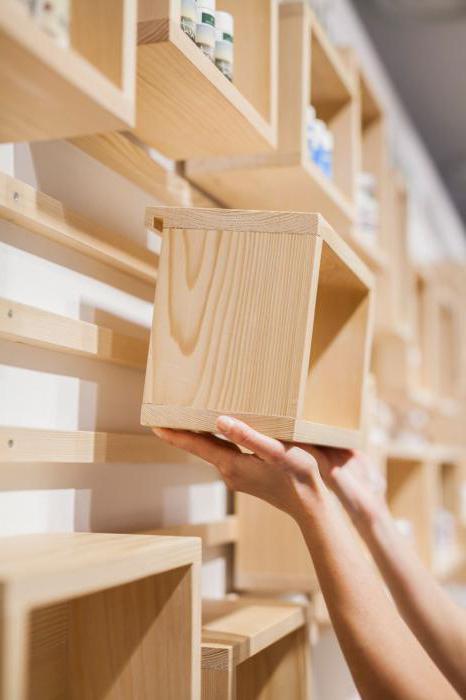
A shelf made of chipboard can be made by handother technology. It will provide for the assembly of individual cubes. The detailing involves the preparation of 20 sidewalls of square cubes with a side of 300 mm. Large shelves will have dimensions equal to 700x300 mm. They will need 10 pieces, as well as small shelves. The dimensions of the latter will be 500x300 mm. Detailing of fiberboard involves cutting 5 blanks with dimensions that are equal to 695x295 mm. Another 5 elements should have dimensions of 495x295 mm.

When chipboard racks are made, photosimilar ready-made structures and the description of works should always be at hand at the master. So, for example, they will allow to understand that the ends should be pasted with a melamine edge. It is selected in the color of the main material. Requires for the work confirmation with the above dimensions. You should also purchase furniture nails, their dimensions are 1.5x25 mm. Purchase self-tapping screws 4x30 mm. With their help, you can pull together the cubes as soon as you compose a beautiful design.
Shelving regiments of chipboard can be manufactured only after you see that there is a certain set of tools available, among them:
After all the tools and parts are ready, you can start assembling.
In order to make shelving, the chipboard is prettyoften used by domestic craftsmen. The technology provides for the assembly of the cube, for this, the back and front edges, as well as the bottom and top, must be marked on the sidewall. On the plane are arranged letters, this will allow you to navigate. From the rear and front parts should be measured 40 mm, while 8 mm measured from the bottom and top parts. This will mark the sidewall for confirmation.
The obtained marks are drilled 8 mmholes. Shelves will have the same width and different length, their width will need to be drilled. In the thickness of the details with the help of a 5-mm drill holes are made, for this it is necessary to go deeper by 60 mm. To obtain a cube, the shelves are pulled together with the sidewalls. The hardboard can be nailed, it is important to keep the right angles. The corks of the Confirmates are decorated with stubs, which can be purchased at the hardware store.
Shelving for the house must have a reliableBase, if the design will have an impressive height. Before starting the work, you must mark the wall. For bearing supports in this case, usually used wooden beams. If the rack will have a height of the room, then the base is fixed not only to the floor, but also to the ceiling. Wooden beams in this case are an excellent base, they can have a rectangular or square shape. Everything will rest on the final size of the finished structure, the width and depth of the shelves.
The frame is twisted by screws, and the reinforcement of the cornerscarried out by slats. The base to the wall can be fixed, then the rack will have a high degree of stability. It is important to ensure that the bearing supports are located vertically. The lateral side slits will ensure the reliability of the rack, which will make the structure rigid. These factors should be taken into account if the rack is subjected to high loads.
If the described piece of furniture will reachon the height of the ceiling, then the finished supports can be finished not only with chipboard, but also with MDF. Fastening in this case is carried out to the beams, on the sides, from above and from below. The result is a finished box that does not have a back wall. But if you want, you can supplement the rack with it. The simplest design consists only of shelves and bars. After completion of the work, the material can be painted.
</ p>
